Deploy Cisco ISE (lab) in KVM on ubuntu
Mar 7, 2021Edits:
- 2020-03-07 - First Init
Caveats:
- This IS NOT a production deployment of any sort. This is for LAB environment
- This is a “Mental note to self” for the next time I want to spin up an ISE when doint unittesting for https://github.com/falkowich/ise .
Like the last guides:
This installation is not made for production or public facing servers, there is no built in security in this setup.
I take no responsibility if this guide bork you server, burn your house down to ashes, make your christmas tree self combust or makes your cat to leave you..
It’s under the “it worked for me[tm]” clause.
This is as always a work in progress.

Preparation is key
Prepare a can of coffee and (if at home) put on your best comfy clothes.
When writhing this, Rage Beats was playing in the speakers. And not everyone in the family is so happy about this :)
Requirements
- For this you must have a functional KVM installation with enough HW for Cisco ISE (the hardware beast) even work in a lab environment.
- If you want to know how to install KVM on ubuntu, just search on the web or give me a shout in the comments.
- An iso with Cisco ISE 3.0, this workaround works for 2.7 too.
Create the VM
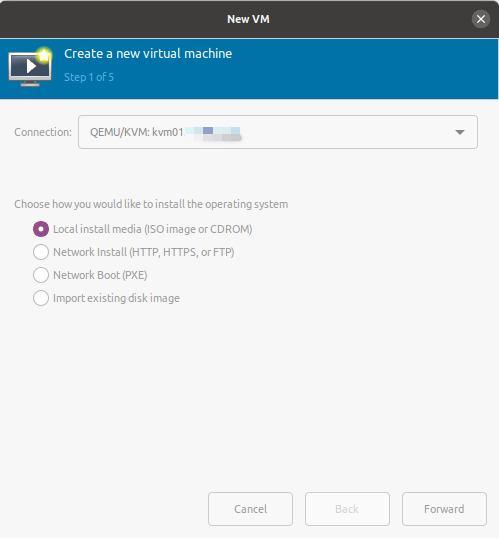
Here comes some pictures from Virtual Machine Manager for ease of use:
Start with creating a new VM on the KVM host.
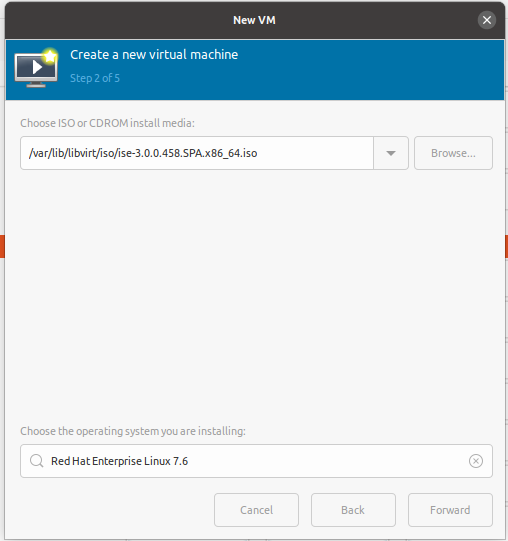
Select the Downloaded ISO
Set minimal hw reqs

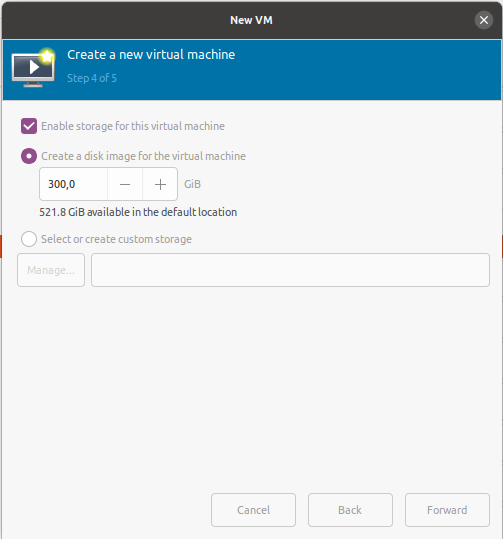
Set minimal disk size
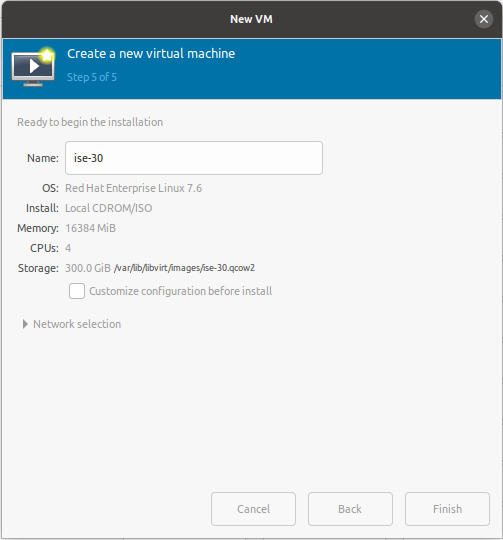
Set name of vm
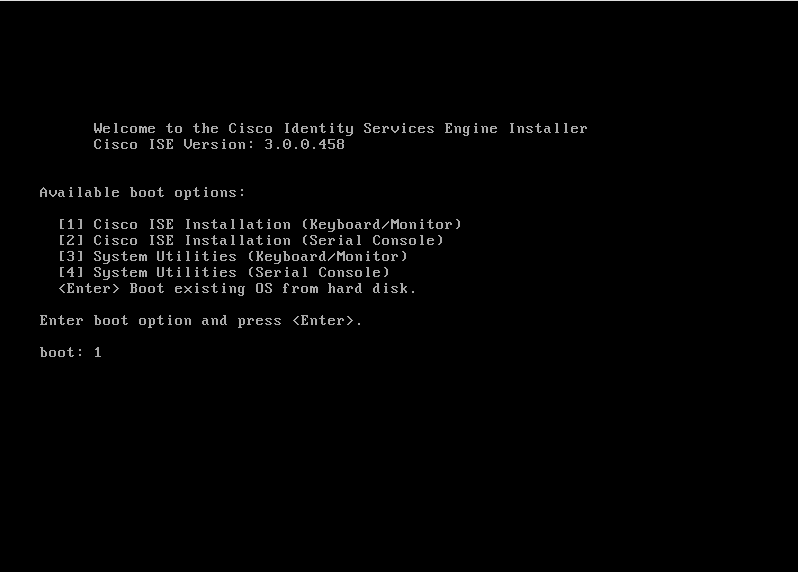
Boot vm
When the bootmenu shows, select 1 [enter]
Then the iso starts to boot, and when the HW checks starts I get this error..
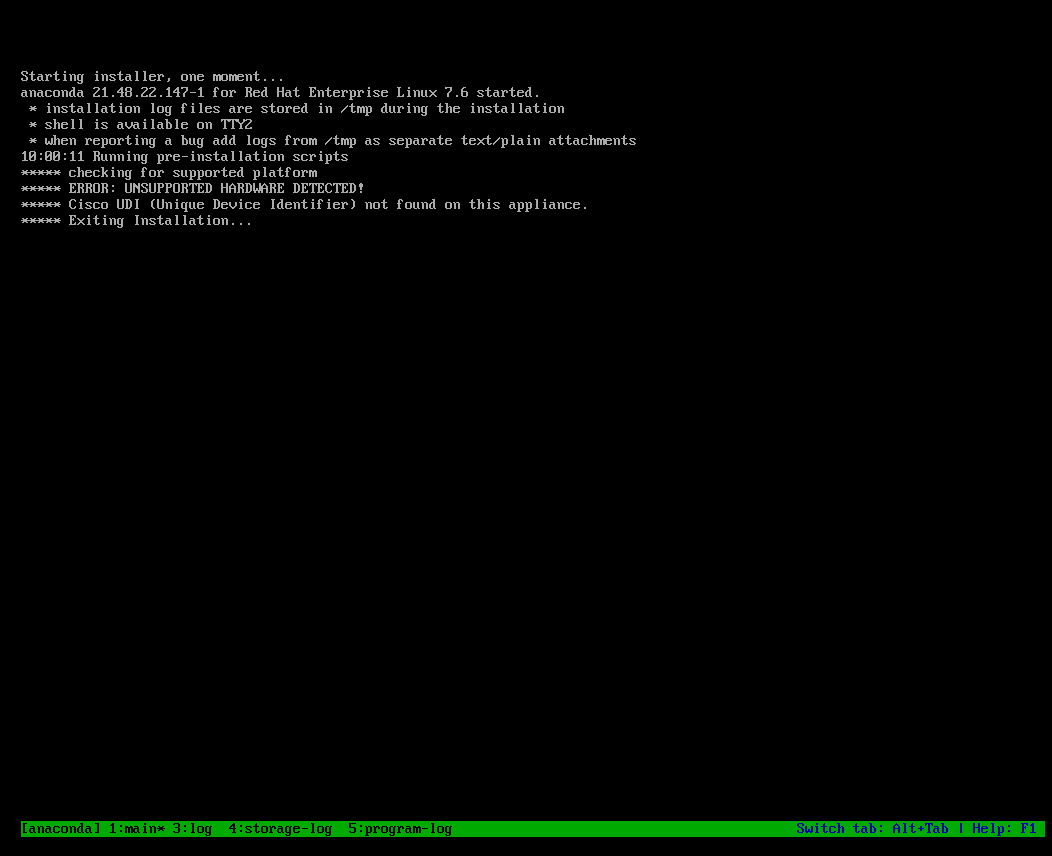
And in text for searchability..
***** checking for supported platform
***** ERROR: UNSOPPERTED HARDWARE DETECTED!
***** Cisco UDI (Unique Device Identifier) not found on this appliance.
***** Exiting Installation
We get this message beq it’s not a supported hypervise. Why I don’t know. But for a LAB we can workaround this problem
Here is the original message from the cisco community:
If using a non-supported hypervisor, make sure to have the ‘KVM’ string in the product field of SMBIOS info.
Solution and workaround in LAB
Shut down the vm
Then on the KVM host show what vm’s that are inactive, and search for your ISE vm.
falk@kvm01:/var/lib/libvirt/images$ virsh list --inactive
 Id    Name                           State
----------------------------------------------------
 -     _template_debian10             shut off
 -     _template_ubuntu20.04          shut off
 -     _ubuntu_docker_template_1804   shut off
 -     _ubuntu_template_1804          shut off
 -     ise-27                         shut off
 -     ise-30                         shut off
 -     kali                           shut off
There you should have the newly started ISE vm with the name you gave it in the installation guide.
When you found the name of the newly created vm (in this case ise-30) we want to add some stuff to the xml of the vm.
falk@kvm01:/var/lib/libvirt/images$ virsh edit ise-30
The start of this xml should look something like this (with exeptions for name and uuid, os arch and such)
<domain type='kvm'>
  <name>ise-30</name>
  <uuid>e84c634b-a34ed-465a-a371-0c6349ab7f0</uuid>
  <metadata>
    <libosinfo:libosinfo xmlns:libosinfo="http://libosinfo.org/xmlns/libvirt/domain/1.0">
      <libosinfo:os id="http://redhat.com/rhel/7.6"/>
    </libosinfo:libosinfo>
  </metadata>
  <memory unit='KiB'>16777216</memory>
  <currentMemory unit='KiB'>16777216</currentMemory>
  <vcpu placement='static'>4</vcpu>
  <os>
    <type arch='x86_64' machine='pc-i440fx-xenial'>hvm</type>
    <boot dev='hd'/>
  </os>
So directly above the tag add the text below.
<sysinfo type='smbios'>
  <system>
    <entry name='product'>KVM</entry>
  </system>
  <baseBoard>
    <entry name='product'>KVM</entry>
  </baseBoard>
</sysinfo>
And inside the tag add this att the end
<smbios mode='sysinfo'/>
The end result with my hw setup looks like this
<domain type='kvm'>
  <name>ise-30</name>
  <uuid>e84c6c4b-afed-465a-a371-0c6fe49ab7f0</uuid>
  <metadata>
    <libosinfo:libosinfo xmlns:libosinfo="http://libosinfo.org/xmlns/libvirt/domain/1.0">
      <libosinfo:os id="http://redhat.com/rhel/7.6"/>
    </libosinfo:libosinfo>
  </metadata>
  <memory unit='KiB'>16777216</memory>
  <currentMemory unit='KiB'>16777216</currentMemory>
  <vcpu placement='static'>4</vcpu>
  <sysinfo type='smbios'>
    <system>
      <entry name='product'>KVM</entry>
    </system>
    <baseBoard>
      <entry name='product'>KVM</entry>
    </baseBoard>
  </sysinfo>
  <os>
    <type arch='x86_64' machine='pc-i440fx-xenial'>hvm</type>
    <boot dev='hd'/>
    <smbios mode='sysinfo'/>
  </os>
Then the workaround is done. Now onto starting the “working installation”.
Start with setting the bootorder

Mount the ISO again

After this, start the vm and go throu with the installation.
If you have any questions just make a shoutout in the comments, or join the slackchannel.
And of course.. Get some coffee and go outside and get some fresh air when the installation is running.
It’s going to take some time :)